The Step-By-Step Guide To Replacing Your Brake Pads Like A Pro
Changing your brakes can seem like a daunting task, especially if you are doing it for the first time. But with the right preparation and know-how, you too can be a pro at changing your brake pads! In this step-by-step guide, we’ll walk you through the process of replacing your brake pads like a pro and provide some useful tips and tricks along the way. From understanding what type of brake pads work best for your vehicle to preparing yourself and your workspace, let’s get started on this easy journey!
What You Will Need
You will need:
– A set of new brake pads (you can usually find these at your local auto parts store)
– A socket wrench set
– A ratchet
– A C-clamp or brake pad spreader tool
– Brake cleaner (optional)
– High temperature grease (optional)
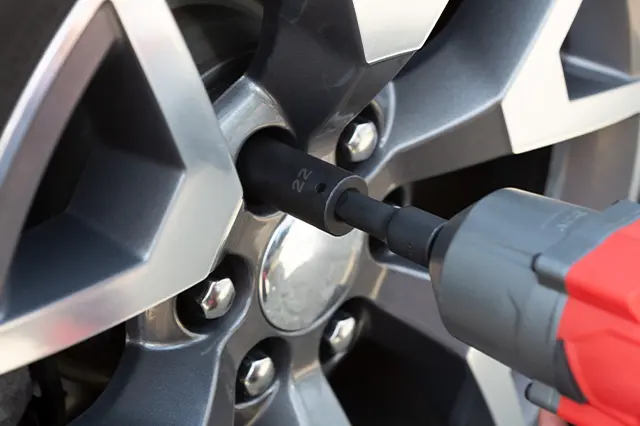
1. Start by removing the wheel. You’ll need to use your socket wrench to loosen the lug nuts before you can pull the wheel off.
2. With the wheel off, you should be able to see the brake caliper. The caliper is what houses the brake pads.
3. Use your ratchet to remove the two bolts that hold the caliper in place.
4. Once the caliper is loose, you can remove the old brake pads.
5. Take a look at the caliper piston. If it’s pushed all the way in, you may need to use a C-clamp or brake pad spreader tool to push it back out so that the new pads will fit properly.
6. Clean off any dirt or debris from the caliper and piston with brake cleaner (or a rag).
7. Put a small amount of high temperature grease on the back of each new brake pad (this is optional but can help prolong their life).
8. Place each new pad into the caliper, making sure they’re positioned correctly before putting everything back together in reverse order.
9. Reattach your wheel and lower your car back to the ground.
10. Pump your brakes a few times to make sure that everything is working properly before you go for a test drive.
11. If you notice any problems, be sure to take your car in for service right away.
Step One: Take Off The Wheel
If you’re going to replace your brake pads yourself, the first step is removing the wheel. You’ll need a few basic tools for this: a jack, a lug wrench, and maybe a breaker bar (if your lug nuts are very tight).
Start by jacking up the car and removing the lug nuts. Then, remove the wheel and set it aside.
Now, use the lug wrench to loosen the nuts on the wheel’s axle. Once they’re loose, use the breaker bar to remove them.
Finally, take the wheel and put it aside. You’ll need to replace the brake pads later on, so make sure you have them before you start!
Step Two: Unbolt The Caliper And Remove It From The Brake Rotor
Assuming that your brake pads need to be replaced, the first thing you’ll want to do is remove the caliper from the brake rotor. This can usually be done by unbolting the caliper with a wrench or socket set. Once the bolts are removed, you should be able to pull the caliper off of the rotor.
Step Three: Remove The Old Brake Pads
Before you can install your new brake pads, you’ll need to remove the old ones. This is a pretty straightforward process, but there are a few things to keep in mind.
First, make sure that you’re working on a clean, level surface. You don’t want anything getting in the way of the brakes while you’re working on them.
Next, locate the caliper. This is the part of the brake that holds the pads in place. Once you’ve found it, use a wrench to loosen the bolts that hold it in place.
With the caliper loosened, you should be able to slide the old brake pads out. If they’re stuck, you can use a screwdriver to pry them loose.
Once the old pads are out, take a look at the rotor. If it’s damaged or excessively worn down, now would be a good time to replace it. Otherwise, just give it a quick inspection to make sure there’s nothing that could potentially cause problems down the road.
With the old pads removed and the rotor inspected (or replaced), you’re now ready to install your new brake pads!
Step Four: Install The New Brake Pads
If your brake pads have never been replaced before, you may need to use a C-clamp or other tool to compress the caliper piston so that the new pads will fit. Consult your vehicle’s repair manual for specific instructions on how to do this.
Once the piston is compressed, you can remove the old brake pads and install the new ones. Make sure that the new pads are properly seated in the caliper before releasing the piston. Again, consult your repair manual for specific instructions on how to do this.
Once the new pads are installed, you can put the wheels back on and test drive the vehicle to make sure that the brakes are working properly.
Step Five: Reattach The Caliper To The Brake Rotor
Now that your new brake pads are in place, it’s time to reattach the caliper to the brake rotor. Doing so is relatively simple:
1. First, make sure that the caliper is properly aligned with the rotor. If it isn’t, you may have to readjust the position of the pads before proceeding.
2. Once the caliper is positioned correctly, use a C-clamp or other similar tool to compress the piston back into its housing. This will make more room for the new pads.
3. With the piston compressed, slide the caliper over the pads and rotor until it’s in its proper place. You may need to wiggle it a bit to get it lined up correctly.
4. Finally, tighten down all of the bolts that hold the caliper in place. Make sure they’re snug but don’t overdo it – you don’t want to strip any threads.
Step Six: Put The Wheel Back On And Test Your Work
Now that you have your new brake pads installed, it’s time to put the wheel back on and test your handiwork.
First, make sure that the brake pads are properly seated in the caliper by gently pushing on them with your fingers.
Next, use a socket wrench to reattach the caliper to the mount.
Finally, lower the jack so that the wheel is resting on the ground again and give the brakes a few pumps to make sure they’re working properly. If everything feels good, then congratulations! You’ve just replaced your brake pads like a pro.
Conclusion
Replacing your brake pads should now be a breeze. By following the steps in this guide, you’ll be able to confidently and safely replace your brake pads like a pro. Make sure to follow all safety protocols while replacing your brakes, as it’s important that you don’t damage any other parts of the car in the process. With regular checks and maintenance, you can ensure that your vehicle retains its optimal performance for many years to come.
